Electronics, seats and more body
Jaco van den Bergh • August 23, 2021
rc-landy 3d-printingThis is post #5 on this project, here's a list of them all.
The next steps of the build were installing the electronics, the seats and some body parts.
Electronics
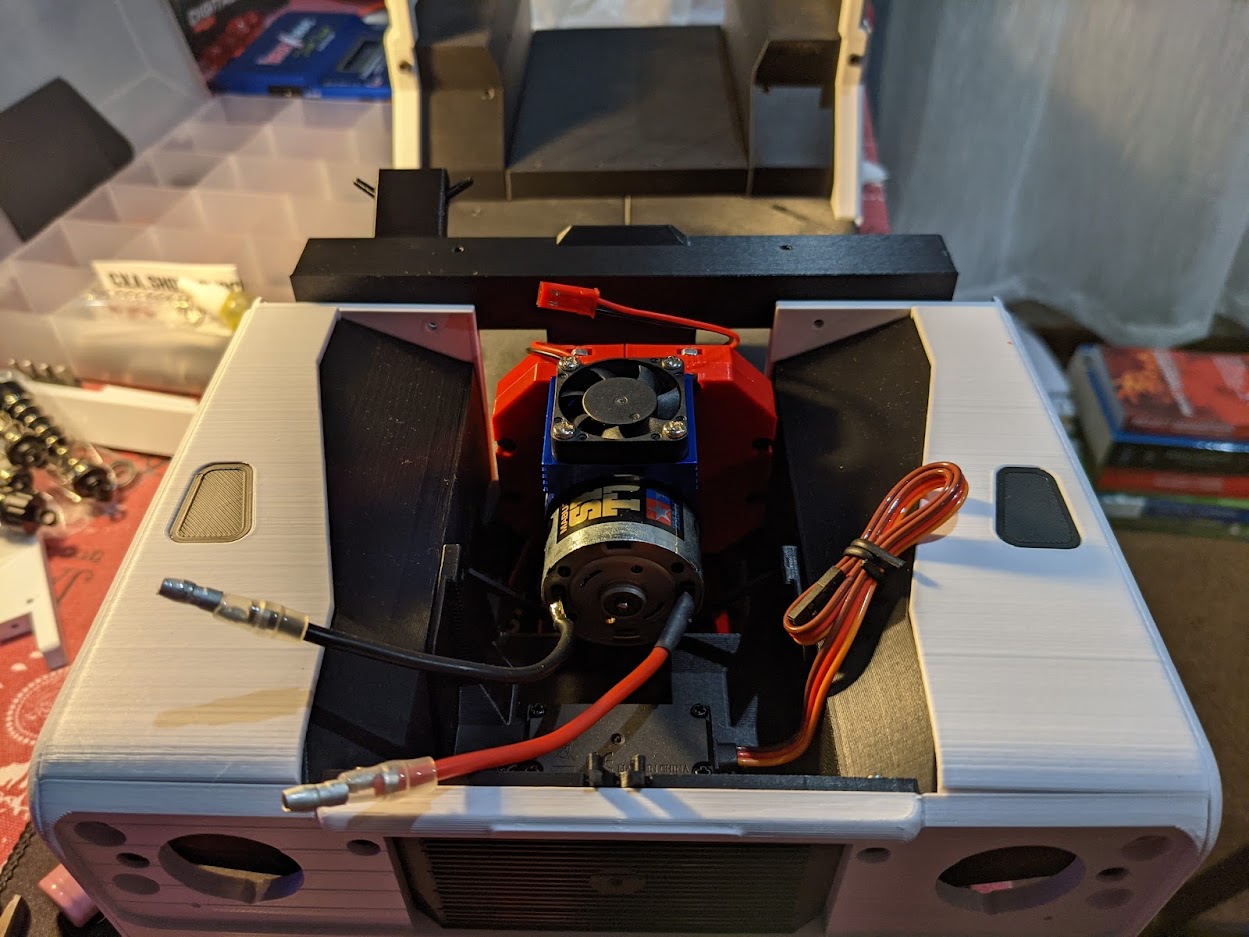
All of the electronic parts are housed in a little box under the front seats. Installing them involved lengthening and joining some wires and attaching the right connectors.

The electronic speed control (ESC) connects to the battery, with the receiver then plugging into the ESC. The servo motor for steering is powered from the receiver, together with the little motor cooler fan.
After making sure the motor and gearbox still works through the ESC, everything is neatly tucked away, with just the on/off switch accessible through the little center compartment. The floor mats have channels for the wires, but the motor cooler's wires are a little too short, so they run their own path for now.

Seats
I ordered brown PLA+ from diyelectronics for the seats, and will also use it for the internals of the axle assemblies.
Disaster struck during the first print attempt when the two front seats toppled at about 75% printed.

I let the print finish, clearing out the spaghetti every now and then from where the two front seats should have been. Turns out, they are a bit top heavy, and printing them with a brim solved the issue. Not fully trusting the brim, I positioned them against each other on the printer just in case.

Great success.

Windscreen, dashboard, grill and fenders
Next up was the windscreen. I used 0.4mm Tamiya clear PLA plate which cut into size quite easily.


The grill installation was tricky, as the lights had to be just the right size to fit snug. I had to trim them quite a bit around the edges. I've also finished the bonnet/hood at this stage.

The fenders also needed a brim to print without lifting at the edges. Turned out great I'd say.

The bumpers were the last parts to print and install before the intricate axle building starts.

