Building a workbench for my home office
Jaco van den Bergh • November 9, 2021
My 3D printed Land Rover project has hit a roadblock; I need to reprint the gearbox in something stronger and more suited for high temperatures.
But I haven't gotten round to sourcing that, so my hobby/electronics table in my home office has been in the below state for about a month.

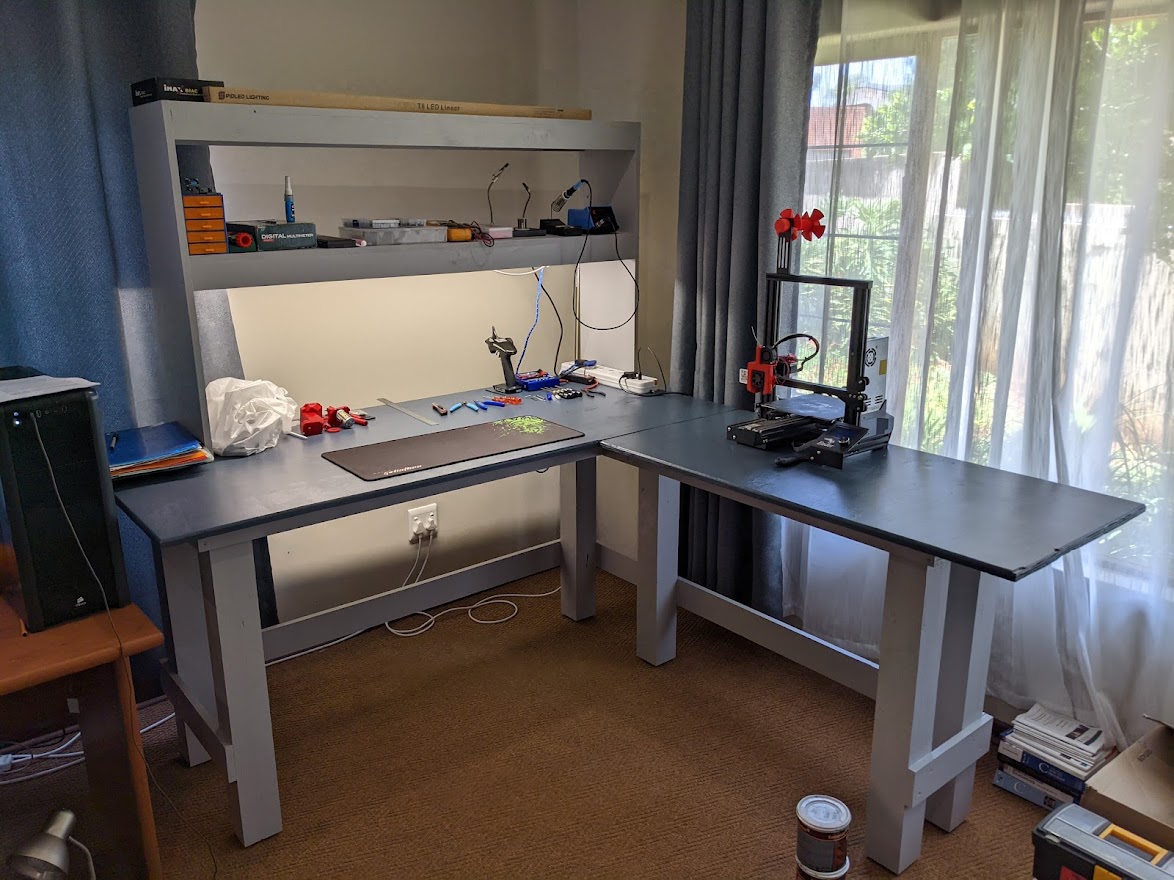
So instead of getting the right filament and finishing the project, I decided it would be a good time to build a proper electronic workbench. To be fair, I got the idea from a Geekpub video and I convinced myself I needed a proper workbench to continue any type of work on the Landy. I purchased the plans, and then started to look around for materials locally. I had to adjust the size of the workbench to fit in the space I had available, and updated the cutting list accordingly.
I used the following:
- Various sizes pine wood for the frame from Chamberlains
- 20mm thick Shutterply for the top from Chamberlains
- BW Grey and Midnight Blue Color-Cote from Chamberlains
- Adjustable feet from Gelmar
I also purchased a shiny new mitre saw, a Metabo KGS 254

I got Chamberlains to cut the shutterply into the required board sizes for the top, and the rest of the cuts were where the Metabo came in.


I couldn't assemble the workbench outside, as it would not fit through the door in one piece. So we carried the pieces into the house, to paint and put together.


For lighting I mounted a PioLed T8 light under the bottom shelf.
So much more room for activities now.
Now just waiting for my laboratory stool from Karo, and a project mat from Takealot.